
Technology is constantly evolving, and now with the instant accessibility of music, podcasts and videos (Netflix binges, anyone?) it's a lot easier to create things and share them online. People are so creative, whether it's vlogging their everyday lives, making cinema-ready movies in their back garden, or even just editing photos to post to Instagram, and it's becoming so much easier to record entire albums outside of the studio, aka in your bedroom. However, it's still kinda difficult and there's a reason that people usually prefer to record music with recording professionals, but for those of us on a budget or for simple audio work like podcasting, nothing beats a good old D.I.Y job. Here are some foolproof, easy and mostly inexpensive ways to record vocals, guitar and interviews for an error-free and fab sounding result.
Tip 1 - Don't use crappy microphones
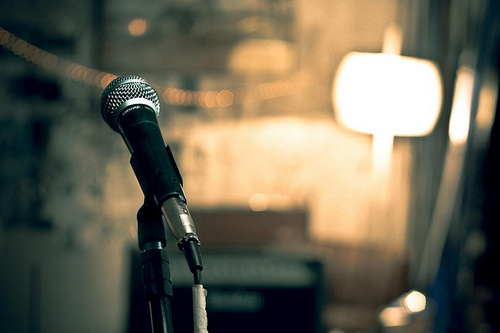
Choose your equipment wisely. Without at least one good microphone, your audio really isn't going to sound any good. It's better not to use a built-in microphone, e.g. your laptop mic, your phone or those headset earphones everyone's using to skate around the driving with a phone ban. A good microphone can set you back literally hundreds of dollahs, but it's always worth fishing around on eBay for deals. The t-bone series of microphones is available on Thomann (usually the best site for musical equipment, with the best prices) and they're great, cheap and most importantly, good. I'd recommend the mb-55, but the best thing about Thomann is that you can hear samples of recordings made with most of the mics and you can make up your own mind. For podcasting, it might be more practical to invest in a Zoom, the cheapest of which retails for around €100 (Zoom H1). These are amazing for vox-pops and vocals in general, and the best thing is that even in quite a loud crowd, they're able to record a single voice really well, provided you point the microphones directly at the source and are fairly close (arm's reach or a tiny bit closer).
Tip 2 - Dynamic vs Condenser
This might be gibberish to you, but here's a very simplified guide: Dynamic microphones are usually cheaper, they don't require their own power supply, and they are mostly more durable. Condenser microphones are a bit more expensive, they require external power (phantom power, supplied through a mixing desk or an external box that you can plug into your wall), and are a bit more sensitive to loud sounds. Dynamic microphones are usually used in live settings, and I'd recommend them for beginners. Condenser microphones are generally able to pick up more frequencies, so they usually deliver a slightly richer sound. They both have their pros and cons, so it's really a personal preference. As I said above, I'd recommend dynamic microphones to beginners as they're cheap and they deliver great audio, but condensers can also be found fairly cheaply and are just as fun to play with.
Tip 3 - Make Sure Your Room Is Quiet
Choose a room that, primarily, nobody will disturb you in. It really helps to be in a room that has as little shiny or tiled surfaces as possible, so no bathrooms! I'd recommend a carpeted room, or else a wooden floor with a large rug. Soundwaves bounce, and these waves that are bouncing all around the room from your window, to your wall - they distort the recording. That's why studios have those strange gray foam things on the walls; they're absorbers, so that the random unwanted soundwaves don't interfere with any beautiful harmonies you might have just sung. Duvets are great for this, so if you can manage, try blocking a bare wall with something cushiony. If all else fails, build a fort, but try to leave a tiny bit of bounce space, or else your audio might sound a little bit too dead.
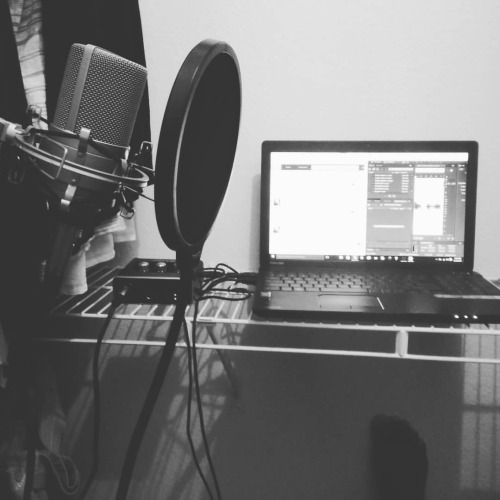
Tip 4 - If You Can, Ditch Your Laptop
Not altogether!!! It's pretty necessary, but while you're recording, do you really want to hear that annoying AF fan? Chances are you'll be recording your audio straight onto your laptop, unless you use a Zoom or something similar, so if you can, put your laptop as far away from your microphone as possible. Try to place it directly in front of you, far away, so that way it'll be completely out of the path of your microphone. Mics are very placement-sensitive, which basically means that the direction it's pointing in will be 90% of the sound it picks up. Ideally, if your microphone cable is long enough, your laptop might even be able to stay out of the room as you record your stuff. Please only do this if the cable fits under the door or something - avoid damaging the cable at all costs!
Tip 5 - Use Freeware
Yep, there, I said it. The program you use is important, but there are so many free pieces of software out there that you'd be crazy not to use one. What you need is a DAW, or Digital Audio Workspace, which is essentially a program that allows you to record audio and edit it. ProTools is all well and good, but it's seriously expensive and, imho, unless you run a studio, not worth it. Audacity is amazing for both recording and editing audio; it's so simple and powerful, and it's easy to use. Just bear in mind that it utilises 'destructive editing', which basically means that when you add an effect or change the audio, the waveform itself is altered. There is an unlimited Undo feature, though, so if you fuck up, you can un-fuck it. Word to the wise: always save a copy of your unedited track as a backup. Other DAWs I'd recommend are MU.Lab and Podium Free.
Tip 6 - Pop Filters Can Save Your Life
I'm joking, of course...but only to a certain extent. If you like to pick a pickled pepper like Peter when you sing, chances are your recording will be overshadowed by pop noises. This can happen when you sing 's' and 't' sounds as well, any hard consonant or basically any part of your vocal that's a tiny bit louder or harsher. Pop filters are little circles that you place in between your mouth and the microphone, and the netting basically 'catches' any hard sounds and filters them. They can be a bit expensive, but a really good option is to make your own; it's easy AF and really cheap (it involves some thin tights - who doesn't have loads of wrecked pairs of tights lying around? Just me? Oh, ok...). Here's a WikiHow tutorial, covering three different methods: Click Here
Tip 7 - If You Make A Mistake, Keep Going
Imagine the scenario: you're in the middle of singing your heart out, you hit the second verse - and you sing the wrong line! Fucking shit! Honestly, keep going. Take a breath, rewind your backing track to the end of the chorus and start the verse again, without stopping your recording. Same goes for podcasting and guitar, unless your backing is very fluid (like fingerpicking on a guitar or something continuous that you can't really cut and paste well). It's much easier to have less little tracks to add and edit when you're finished recording, and it's so simple to just select a piece of audio and cut it. Simples. Like the meerkat. Seemples.
Tip 8 - Put Your Backing Track Into Your Headphones
If you're recording a vocal and you need to sing along to something, have it play through earphones and listen to the track in one ear. If you're singing along to another vocal or a guitar, record the guitar/other vocal first, and listen through earphones as well. It's easier to record things separately, because if you play the guitar and sing, chances are your guitar is going to be drowned out by the vocal, or vice versa. Separate tracks also means cleaner editing. Podcasting is a different story; the best advice I can give is to interview people away from unpredictable noise (a group of friends laughing, a really loud siren, a church bell, etc) and to record a separate clip of just background noise and no talking, because this can be very handy in the editing stages later on.
So these are just a few tips that might be useful, but the main thing when recording audio is to enjoy it! It's a fantastic way to express creativity and to capture some amazing ideas, and who knows, you might do something spectacular!


